
How to Customize Google Forms
Published: 11 months ago
When we think about branding, often our minds gravitate towards logos, color palettes, and unique designs. Yet, branding transcends these elements; it narrates the tale of your enterprise, crafting a memorable impression on your clientele. A crucial and sometimes overlooked component of this narrative is the header image of your online forms.

In the vast world of digital interactions, an online form's header image often serves as the inaugural handshake - setting the stage for what's to come. A captivating header not only intrigues the viewer but also anchors the ethos of your brand firmly in their minds. Conversely, a lackluster or ill-fitted header can diminish user experience, casting a shadow on your brand's integrity.
In this guide, we'll delve deep into:
Harness the power of Google Forms and learn how to integrate a header image that not only looks great but also fortifies your brand's image. Dive in, and let's elevate your forms to the next level!
Google Forms offers a convenient solution for creating basic forms. However, when it comes to personalization and design capabilities, it may fall short for some users.
Even if your brand's signature color resembles Google's default purple, perhaps you'd like to give your form a personal touch. Maybe by incorporating a specific image that aligns with your brand's identity.
To aid in this process, we've assembled a comprehensive guide on incorporating a custom header image to your Google Form, ensuring that the design cohesively meshes with your branding. We'll also suggest a simpler alternative for achieving this.
To begin, click on the paint palette symbol situated in the top-right corner of the Google Forms editor.

A menu will emerge on the right. Here, you can modify theme and background colors or opt to 'Choose an image' to personalize your form header.

Upon accessing this menu, you're presented with a variety of images to choose from, the option to upload directly, or even the ability to fetch images from your Google Photos.
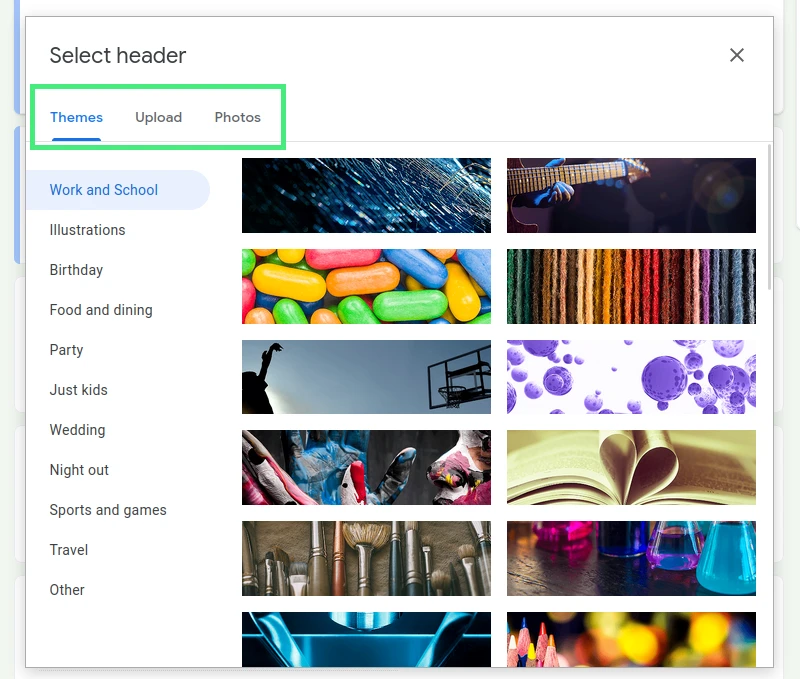
If you're content with utilizing generic graphics, you're all set. These predefined designs already adhere to the necessary 4:1 aspect ratio, ensuring a perfect fit.
However, for those who wish to use specific images or logos, remember to adjust your selection to Google's peculiar 4:1 ratio. This often means sacrificing parts of the image that may be vital.
Take, for instance, our use of a fun image. The cropping might remove essential elements, rendering the end result less than ideal.
This becomes especially problematic with company logos. Cropping could distort the logo's appearance, which is far from ideal when branding is at stake.
The ideal dimensions for a Google Forms header image sit at 1600x400, which translates to an aspect ratio of 4:1. In simpler terms, if you want your image to be displayed without hitches, ensure it spans 1600 pixels in width and is confined to a height of 400 pixels.
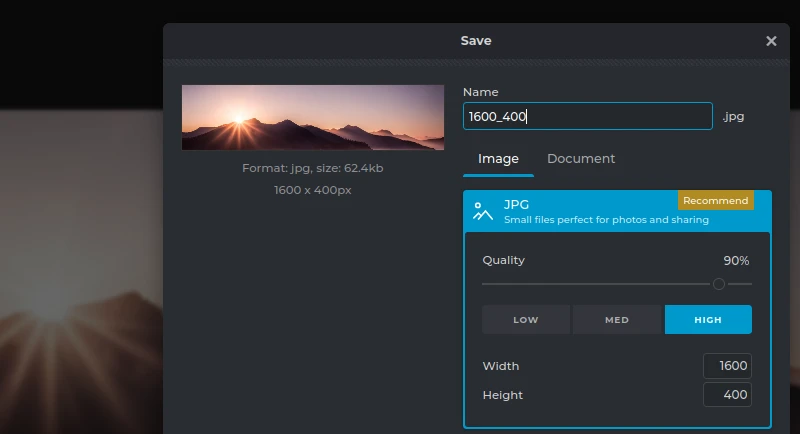
While it might seem tedious to employ an external tool just for adjusting image dimensions, the process is straightforward. Platforms like Pixlr come in handy for this purpose. Simply set up a new canvas or frame with the desired width (1600) and height (400), and you're good to go. Place your emblem or desired image within these bounds.
To spice things up, you have the liberty to play around with backgrounds, even opting for transparency if you wish. For demonstration purposes, we're going with a classic white backdrop. As depicted in the image below, integrating a suitable background ensures the emblem seamlessly blends into the header banner. screenshot showing a
In most cases, Google Forms attempts to auto-adjust the color scheme based on the uploaded image. However, as observed in our monochromatic example, this doesn't always hit the mark. This leads to a theme that might feel lackluster and in dire need of some color infusion.
Fortunately, it's not all bleak. You can revamp the aesthetics by revisiting the theme menu, where you can introduce your preferred theme and background hues. This small tweak can add a touch of sophistication and alignment with your brand's aesthetics. Despite these tweaks, the inherent Google Forms look remains. If you're considering more design alterations, you have the option to modify the font. However, choices are limited with only four preset styles to select from.
Adding a custom header image to your Google Forms is more than just an aesthetic choice; it's a strategic move to strengthen brand recognition, enhance user engagement, and create a memorable digital interaction. While Google Forms may primarily be recognized for its functionality, with the steps provided in this post, you can elevate its design to be just as impactful. Remember, in today's digital landscape, every touchpoint, even something as straightforward as a form, contributes to your brand's narrative. So, take a moment to refine those headers, make them resonate with your brand's essence, and offer your audience a cohesive and visually pleasing experience. After all, it's often the details that leave a lasting impression.
Related Articles
Just discovered Nerdy Form? Try our free form builder now!
Sign up for FREE