Easy way to create a form with a datepicker
This blog post is about using a form builder to create a datepicker form field. We will discuss what a form builder is, what a datepicker is, and what a datepicker can be used for. We will also provide step-by-step instructions for creating a datepicker form field with a form builder. Finally, we will discuss the advantages of using a form builder to create a datepicker form field.
What is a form builder?
Form builders are web-based creation tools that allow users to quickly and easily create web forms without needing to write any code. Form builders provide a drag-and-drop interface for users to design their forms, which can then be embedded on websites or shared as a link for other users to fill out.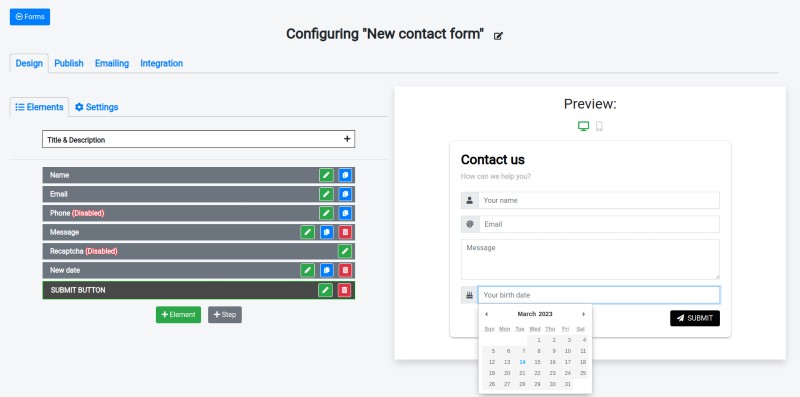
Form builders usually include features such as input fields, file upload elements, text areas, checkboxes, dropdown menus and datepickers.
What is a datepicker?
A datepicker is a type of input field that allows users to select a date from a calendar popup. Datepicker fields are typically used in forms when users need to enter dates, such as birthdays, appointments, and deadlines. Datepickers are typically implemented as a text field with a calendar icon next to it. When the user clicks on the calendar icon, a calendar popup appears, allowing them to select the desired date.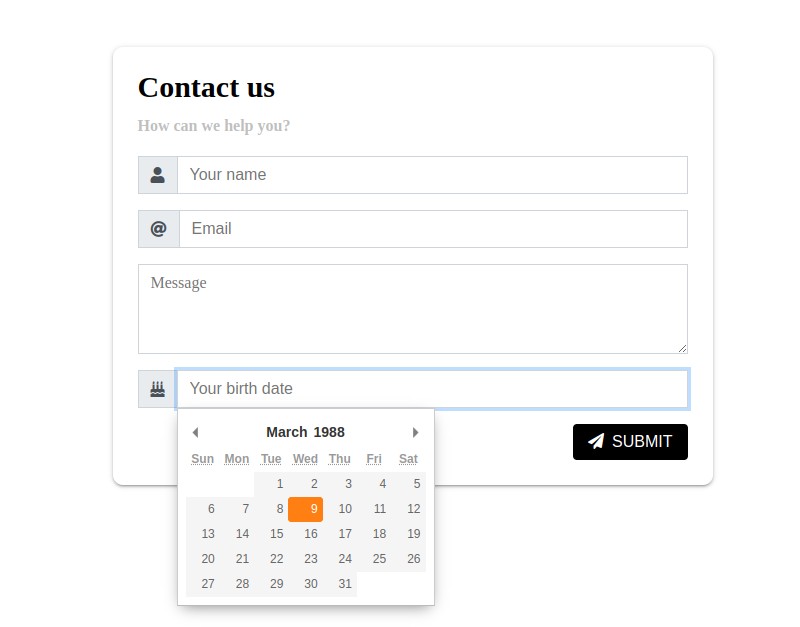
A datepicker is a JavaScript package that takes at least several days to be created from scratch. Rather than creating a datepicker from scratch, form creators often use existing datepicker packages that have already been created. Integrating a datepicker into a form usually requires programming skills, which can be time-consuming and difficult for those without the necessary expertise. However, with a form builder like Nerdy Form, creating a datepicker field is a breeze, allowing users to create forms with datepickers in just a few clicks.
Examples of datepicker usage in forms
Datepickers are commonly used in forms for a variety of purposes. For example, they can be used to allow users to enter their birthdate, select a delivery date for an order, or choose a pickup date for a rental item. Datepickers can also be used to allow users to enter an expiration date for a promotion or coupon code. Datepickers are also commonly used in event registration forms, allowing users to select the date for an upcoming event.
Event registration forms are forms used to register participants for an event, such as a conference, workshop, or other gathering. Event registration forms typically include fields for collecting information about the participant, such as their name and contact information. They may also include datepicker fields, allowing users to choose the date they would like to attend the event.
When selecting a delivery date for an order, datepickers can be used to allow customers to pick a date and time that is convenient for them. This allows customers to select a delivery date that works for them, and helps ensure that their order will arrive on time. Datepickers can also be used to set a deadline for orders, allowing customers to select a date by which their order must be placed in order to receive it by a certain date.
Ability to restrict dates
Datepickers also have the ability to restrict dates, allowing users to only select dates that are within a certain range. This can be used to prevent users from selecting dates that are too far in the future or past. For example, a datepicker can be configured to only allow users to select dates within the next two weeks, or dates that are within the current month. This feature can be useful for businesses that require customers to place orders on specific dates, or for event registration forms that require participants to select a date that falls within the event's timeframe.
Date formats
Datepickers also have the ability to display different date formats, allowing users to select a format that is suitable for their region. For example, some regions may prefer to use the mm/dd/yyyy format, while others may use the dd/mm/yyyy format. By allowing users to choose the format that is most suitable for them, datepickers can provide a more user-friendly experience.
A step-by-step guide to creating a form with a datepicker
We will be creating a simple contact form in this guide. It will have a datepicker that allows users to pick a date of birth.
1. Create a form.
First of all, we need to create a form.

Click on the "+Form" button and choose the "Contact form" template.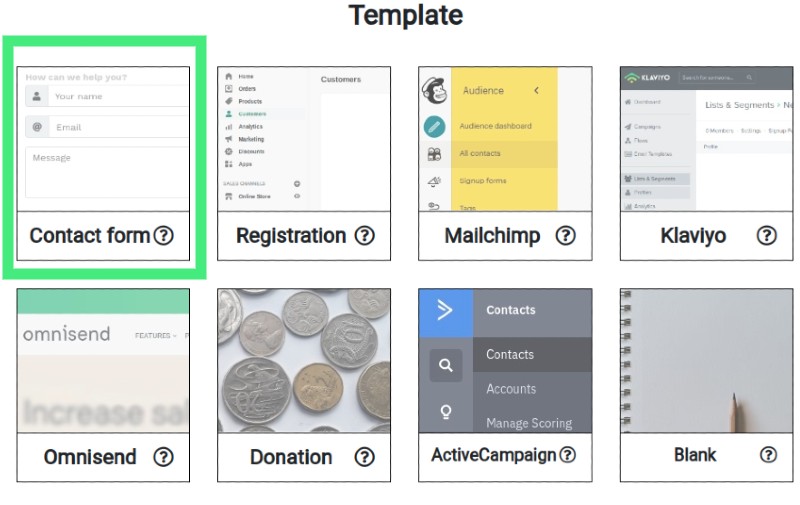
A simple contact form is created. Let's move on to the next step.
2. Adding a datepicker element
Click on the "+Element" button in the element list on the "Design" tab. Choose element of type "Date".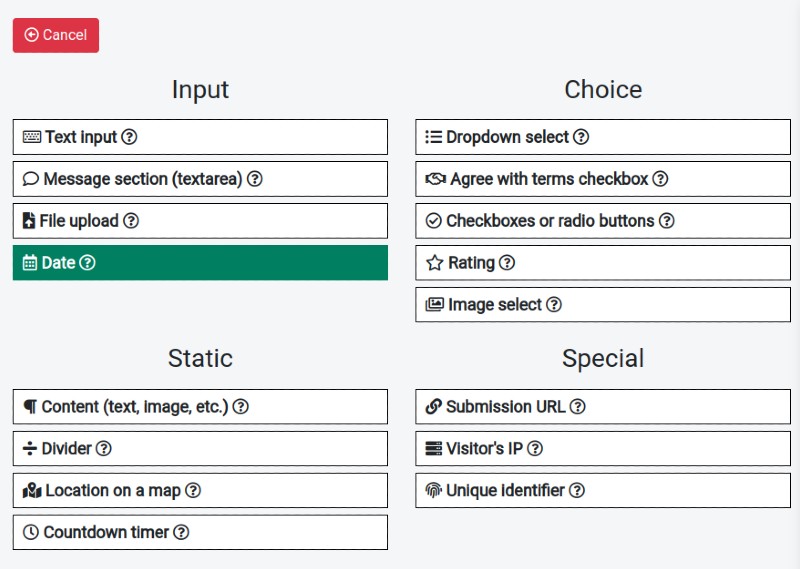
The form has a datepicker element now. It might have additional customization because we are creating a date of birth field in this guide.
3. Restrict the year that can be chosen.
Nerdy Form has a useful feature that allows you to restrict the dates that can be chosen in the datepicker. Let's configure the datepicker element to have the ability to choose only suitable years of birth. Click on the "Edit" button near the date element in the element list. Find a "Restrict available dates" section. 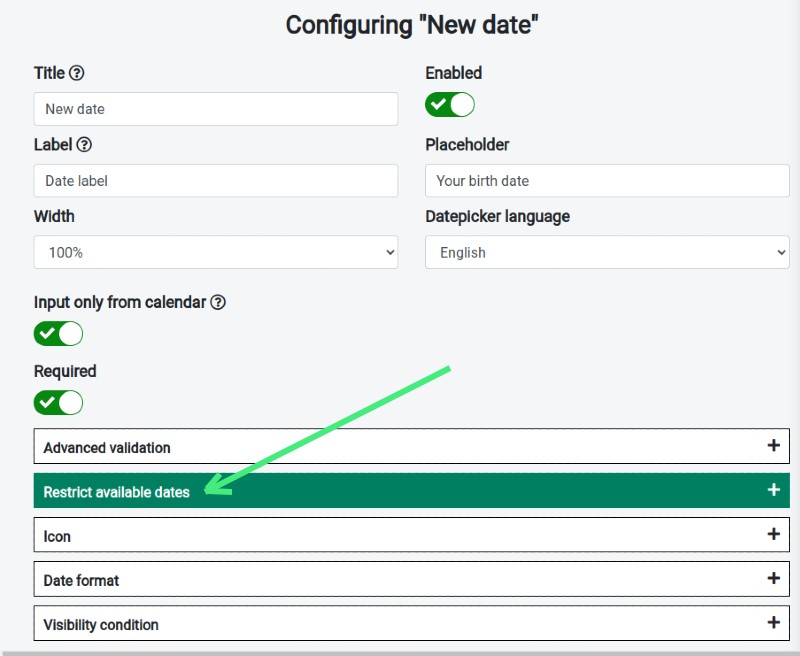
Set the minimal and maximal available years as shown in the image below.
4. Publish the form.
The form with the datepicker is ready to use now and can be published on your website or shared. 
Use the "Publish" tab and follow the short instructions there in order to start using your form.
Conclusion
Form builders provide an easy way to create forms with datepicker fields. Datepickers can be used for a variety of purposes, such as collecting birth dates, setting deadlines, and selecting a delivery date for an order. With a form builder, users can easily create datepicker fields and customize them to their needs, such as restricting dates or providing different date formats. Using a form builder to create a datepicker field can save time and provide a more user-friendly experience.
Nerdy Form is a form builder that allows users to quickly and easily create forms with datepicker fields. It offers users the ability to restrict dates and set their preferred date format. With Nerdy Form, creating a datepicker field with just a few clicks is easy and hassle-free.