Integrating Nerdy Form with Mailchimp: A Comprehensive Guide
Mailchimp is a powerful and widely-used email marketing platform that allows businesses and individuals to build and manage their email lists, create and send engaging campaigns, and analyze the performance of their marketing efforts. With a user-friendly interface and a plethora of tools and features, Mailchimp has become the go-to solution for those looking to establish and maintain strong relationships with their subscribers, drive conversions, and increase brand awareness.
Maximizing Mailchimp's Potential and Expanding Your Subscriber Base
One of the most critical aspects of any successful email marketing strategy is growing a list of subscribers. A robust and engaged subscriber list is the backbone of an effective email marketing campaign, as it provides a targeted audience that is interested in your products, services, or content. By cultivating a quality list of subscribers, businesses can ensure that their marketing efforts are reaching the right people, leading to higher open and click-through rates, more conversions, and a stronger return on investment.
There are several key reasons why growing a list of subscribers is essential. Firstly, it helps businesses maintain a direct line of communication with their audience, allowing them to nurture relationships and build trust over time. This is particularly important in an era where social media algorithms can limit the reach of organic posts, making it more challenging to connect with potential customers. By building a strong email list, businesses can bypass these limitations and communicate directly with their audience.
Additionally, a well-maintained list of subscribers allows businesses to segment their audience, delivering highly targeted content that caters to specific interests or needs. This personalization leads to increased engagement, higher conversion rates, and ultimately, greater customer loyalty. With Mailchimp's advanced segmentation and targeting features, businesses can fine-tune their email campaigns to resonate with their subscribers, ensuring that their marketing efforts yield the best possible results.
Nerdy Form is a great tool for creating subscription forms. See our simple guide for creating an email subscription pop-up using Nerdy Form.
Nerdy Form and Mailchimp
Nerdy Form, the popular and easy-to-use form builder, now offers seamless integration with Mailchimp, the leading email marketing platform. This integration allows you to automatically add new contacts from your Nerdy Form submissions directly to your Mailchimp audience, simplifying the process of growing your email list and streamlining your marketing campaigns.
In this comprehensive guide, we will walk you through the step-by-step process of enabling the Mailchimp integration for your Nerdy Form. By following these simple steps, you'll be able to enjoy the benefits of a unified and efficient workflow, saving time and effort while focusing on your core business activities.
Step-by-step Guide For Integrating Nerdy Form with Mailchimp
Step 1: Edit the form
Before you can enable the Mailchimp integration, you need to have a form created using Nerdy Form. If you haven't already, sign up for a free account and create a new form or select an existing form you'd like to integrate with Mailchimp.
Once you've chosen the form you want to use, click on the "Edit" button to open the form editor. This is where you'll configure your form's fields, settings, and design, as well as enable the Mailchimp integration.
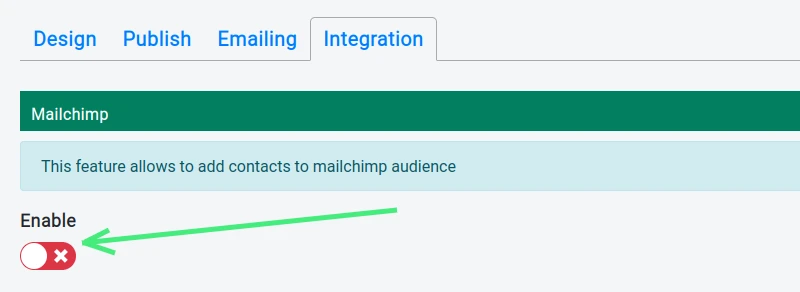
Step 2: Enable the Mailchimp integration on the "Integrations" tab
With your form open in the editor, navigate to the "Integrations" tab located at the top of the screen. This is where you'll find the option to enable the Mailchimp integration. Click on the toggle switch to enable the integration. Once enabled, additional configuration options will appear.
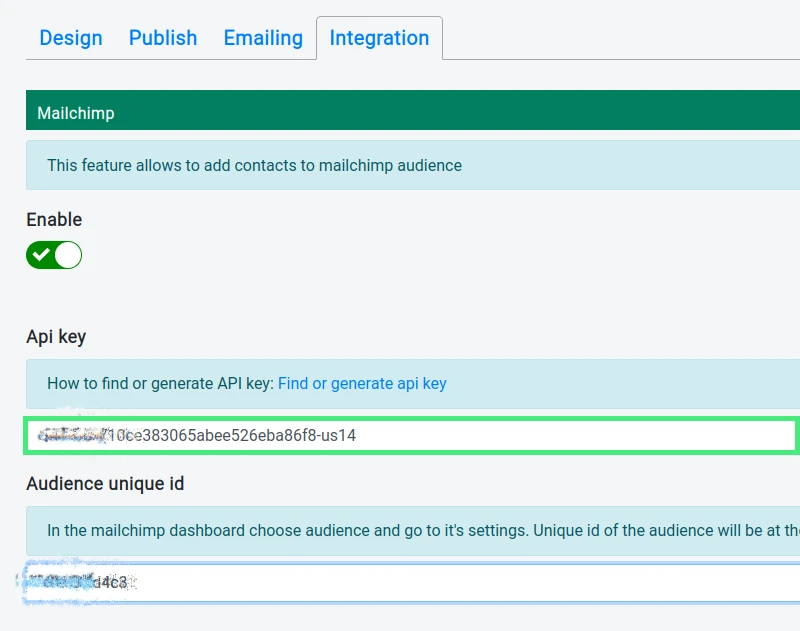
Step 3: Copy API key in Mailchimp account and paste it to "Api key" input
To connect your Nerdy Form to your Mailchimp account, you'll need to provide your Mailchimp API key. This key is a unique identifier that allows Nerdy Form to access your Mailchimp account securely.
To find your Mailchimp API key, log in to your Mailchimp account and navigate to the "Account" page. From there, click on the "Extras" dropdown menu and select "API Keys." If you don't already have an API key, you can create one by clicking the "Create a Key" button.
Once you have your API key, copy it and return to the Nerdy Form. In the Mailchimp integration settings, paste your API key into the "Api key" input field.
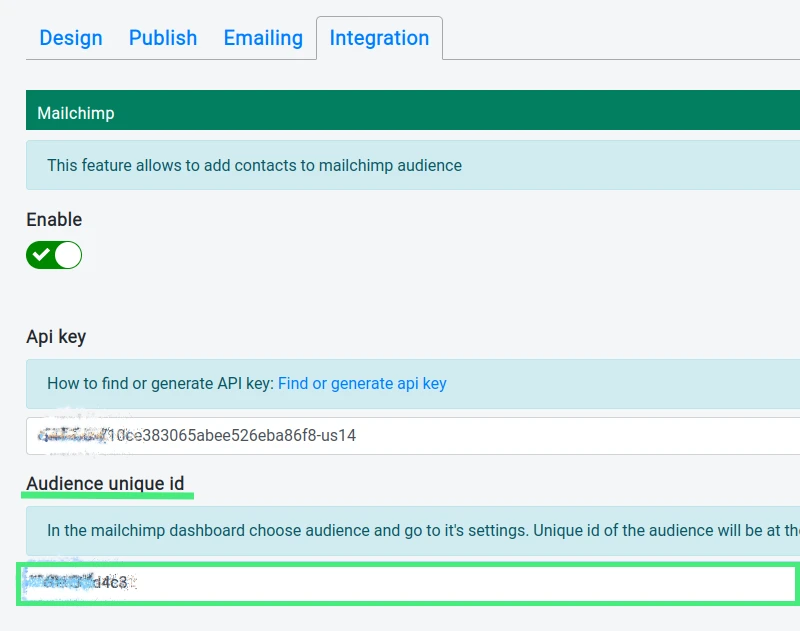
Step 4: Copy Audience ID from Mailchimp account and paste it on "Audience Id" input
After entering your API key, you'll need to provide the Audience ID for the Mailchimp audience you want to add your new contacts to. The Audience ID is a unique identifier for each audience in your Mailchimp account.
To find your Audience ID, go to your Mailchimp account and click on the "Audiences" tab. Select the audience you want to use and click on the "Settings" dropdown menu. Choose "Audience name and defaults," and you'll find the Audience ID displayed in the "Audience ID" section.
Copy the Audience ID and return to the Nerdy Form editor. Paste the Audience ID into the "Audience Id" input field in the Mailchimp integration settings.
Step 5: Save the changes
With the API key and Audience ID entered, double-check your integration settings to ensure they're correct. Once you're satisfied, click the "Save" button at the top of the form editor to save your changes. This will apply the Mailchimp integration to your form, allowing you to start collecting new contacts from your form submissions.
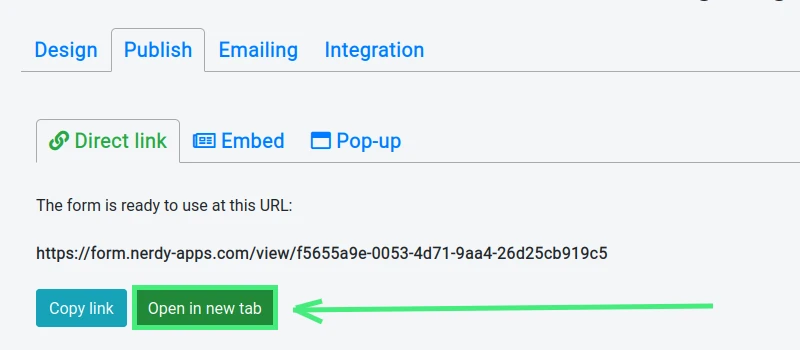
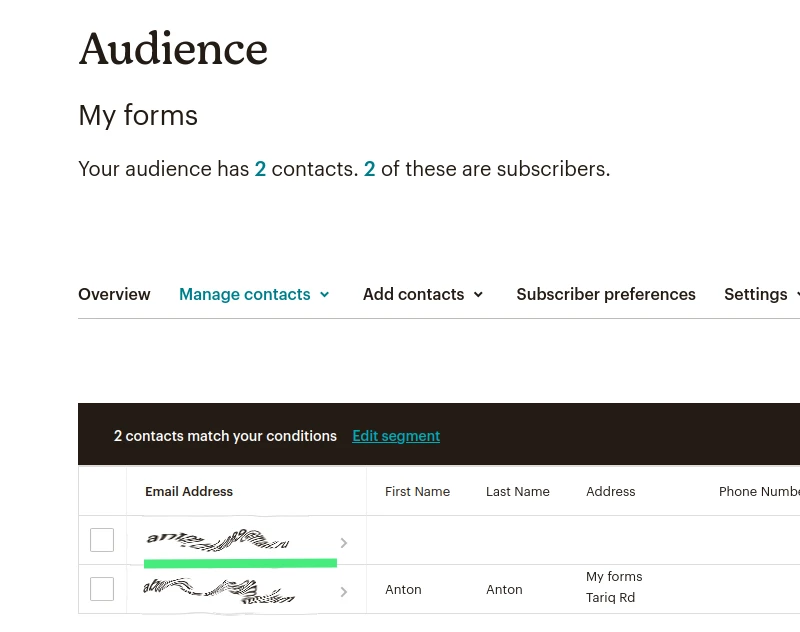
Step 6: Check that when a form is submitted new contact is added to the audience
To verify that the Mailchimp integration is working correctly, you'll want to test your form by submitting a new contact. You can do this by opening the Publish tab, Direct Link, click "Open in new tab" button. Fill out the required fields of the form, and clicking the "Submit" button.
After submitting the form, navigate to your Mailchimp account and access the audience you connected to your Nerdy Form. Check the "Contacts" section to see if the new contact has been added. If everything is set up correctly, you should see the contact information from your form submission in your Mailchimp audience.
Conclusion
Integrating your Nerdy Form with Mailchimp is an incredibly valuable feature that can save you time and effort when it comes to managing your email lists and marketing campaigns. By following the steps outlined in this guide, you'll be able to harness the full potential of this powerful integration, streamlining your workflow and ensuring a seamless connection between your form submissions and Mailchimp audience.
With Nerdy Form's intuitive form builder and Mailchimp's robust email marketing tools, you have a winning combination that can help you grow your audience, engage your subscribers, and ultimately drive the success of your marketing efforts.
As you continue to explore the many features and capabilities of Nerdy Form, consider how other integrations can also improve your workflow and enhance your marketing strategies. Nerdy Form offers a wide range of integrations with popular tools and platforms, making it an ideal choice for businesses looking to simplify and optimize their processes.
With this comprehensive guide, you now have the knowledge and confidence to enable the Mailchimp integration for your Nerdy Form, taking a significant step toward a more efficient and effective email marketing strategy. Happy form building and emailing!