
How to Protect a Google Form with a Password
-
"Add a Short Answer Question: Initiate by creating a new question at the beginning of your form where users will enter the password."
-
"Set up Response Validation: Use the 'Regular Expression' option to check if the entered text matches the password you set."
-
"Divide Your Form into Sections: Limit access to the rest of the form by dividing it into sections, effectively hiding the subsequent parts until the correct password is entered."
Ever wondered how you could protect your Google Form with a password? It's a common question for anyone who wants to keep their forms secure. Regrettably, Google Forms does not have a built-in password protection feature. However, fear not! There's an ingenious workaround that you can use. Let's dive into it.
The trick lies in creating a special field that serves as a password prompt. Then, you redirect the respondent to a subsequent part of the form that's otherwise hidden. Here's how you do it:
Step 1: Add a Short Answer Question
Start by creating a new question at the beginning of your form. Make sure it's a "Short answer" type question. This is where users will input the password.
Step 2: Set up Response Validation
Next, click on the three dots located in the lower right corner of your question block and select the "Response validation" option.
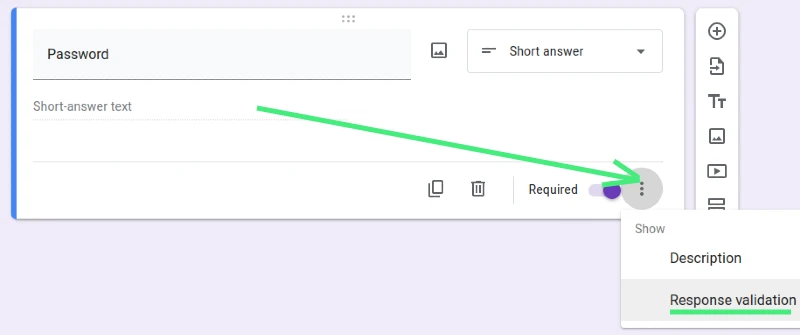
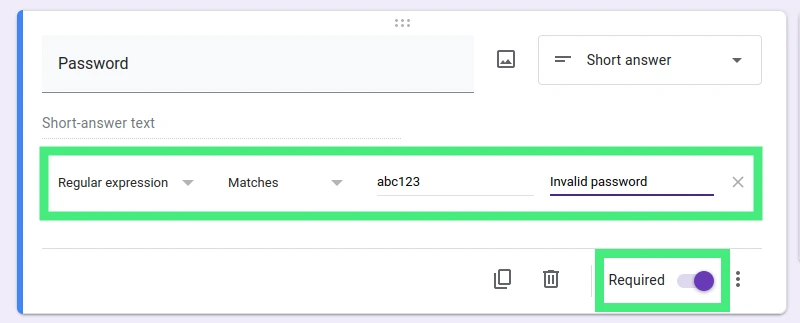
When you choose response validation, a few new options will appear. In the dropdown menu, select "Regular Expression". Then, in the next field, choose "Matches". In the final box, input the password you want users to enter. This feature allows you to set up conditions for the answer.
Although regular expressions can sometimes be complex, in this case, we only need a simple match. Essentially, if the entered password matches the one you set, the respondent can move forward. Don't forget to set this question as "Required".
Step 3: Divide Your Form into Sections
Now, to limit access to the rest of the form, click on "Add section" located in the hover menu next to the question.
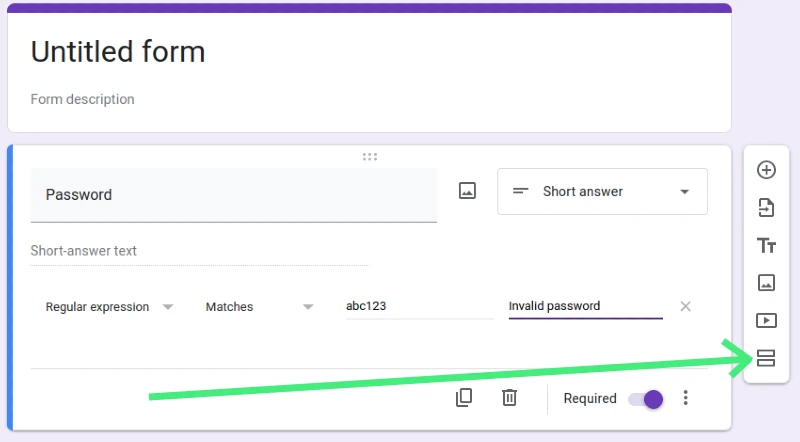
By dividing your form into sections, you can effectively hide the rest of the form from respondents until they provide the correct password.
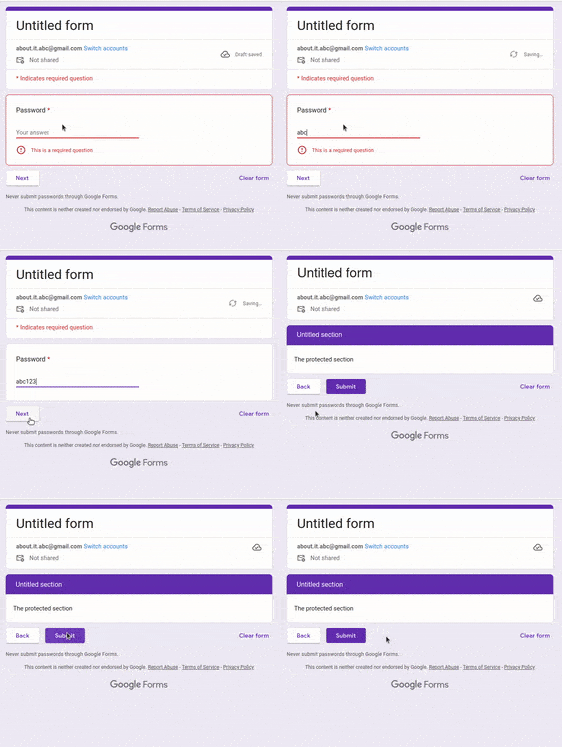
As a result, when visitors land on your form, they'll only see the first section - the password prompt. Only upon entering the correct password will they gain access to the rest of the form.
Voila! You have successfully 'password-protected' your Google Form.
A Word on Safety
It's important to note that this method doesn't provide robust security. The truth is, this workaround is notably lacking in security measures. The reason lies in how Google Form validations are handled - they're client-side, meaning the password is included on the webpage and can be easily discovered by anyone versed in using their browser's developer tools.
Alternative to password protection
In the Responses menu, you'll find an option that allows you to limit the number of times an individual can complete the form to just once. If this aligns more closely with your needs, it could be a superior alternative to password protection.
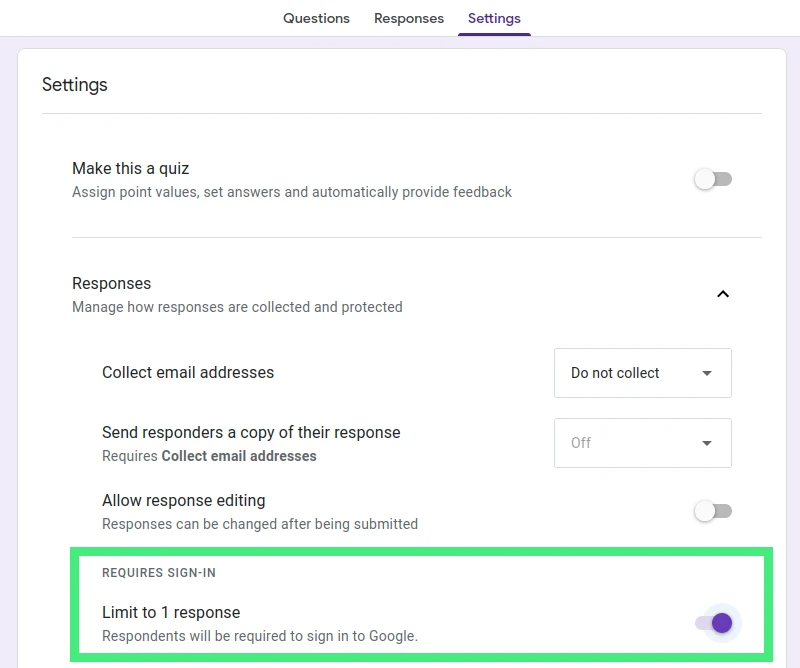
By setting the form to only allow one response per person, respondents would be required to log in to their Google accounts before being able to submit the form. However, this may not be exactly the solution you had in mind.
Once you've established response limits, you could also incorporate a feature to your form that collects email addresses. This would allow you to manually sift through and weed out any undesired email submissions from unfamiliar individuals. Despite this, it's understandable if you're in search of a more effective and convenient solution.
Conclusion
Remember, while this method isn't a foolproof way to protect sensitive information, it does add an extra layer of security and can deter unauthorized access to your Google Form. It's a clever workaround until Google comes up with a built-in password protection feature for their Forms.
Keep your data secure, and happy form creating!

