Integrating Google Forms with Zapier: A Guide to Seamless Data Automation
For many, data collection is a fundamental part of daily operations. Google Forms, a user-friendly tool for creating surveys and gathering feedback, has become a go-to solution for both professionals and hobbyists alike. Yet, what if we could elevate its functionality even further by reducing manual tasks associated with it? Enter Zapier, a powerful tool that bridges the gap between different apps, allowing them to "talk" to each other without requiring a single line of code. This guide will walk you through the process of connecting Google Forms with Zapier, unlocking new layers of efficiency and automation for your data collection needs. Whether you're looking to automatically add respondents to your email list, save entries to a spreadsheet, or trigger other specific actions after a submission, you're in for a treat. Buckle up, as we dive into the world of seamless automation!
Benefits of Bridging Google Forms with Zapier
Connecting Google Forms to Zapier doesn't just save time; it transforms the way you handle data, allowing for a more streamlined and efficient process. Here are some of the key benefits:
-
Automated Workflows: No more manual transfers of data. Set up a Zap once, and let the automation handle repetitive tasks for you.
-
Enhanced Data Management: Automatically send form responses to spreadsheets, CRM systems, or other platforms without lifting a finger.
-
Immediate Notifications: Get real-time alerts or notifications on platforms like Slack or via email whenever there's a new form submission.
-
Effortless Integrations: Zapier supports thousands of apps, letting you connect Google Forms with almost any tool you use.
-
Improved Engagement: Automatically add new form respondents to email marketing campaigns or follow-up sequences, ensuring you never miss an opportunity to engage.
-
Error Reduction: Automated data transfer minimizes the risk of manual entry errors, ensuring your data stays accurate.
-
Flexibility and Customization: Create custom workflows tailored to your specific needs, from simple data transfers to complex multi-step actions.
Incorporating Zapier with Google Forms not only boosts your productivity but also opens doors to endless possibilities for seamless data operations. Whether you're a business owner, a marketer, or just someone looking to optimize their tasks, this integration proves invaluable.
How to Get Started with Google Forms on Zapier
Are you looking to automate your workflow by integrating Google Forms with Zapier? This step-by-step guide will help you seamlessly connect your Google Forms account with Zapier, paving the way for a multitude of automated tasks. Follow along, and you'll have your Google Forms zapping in no time!

Step 1: Initiate Your Google Forms Zap
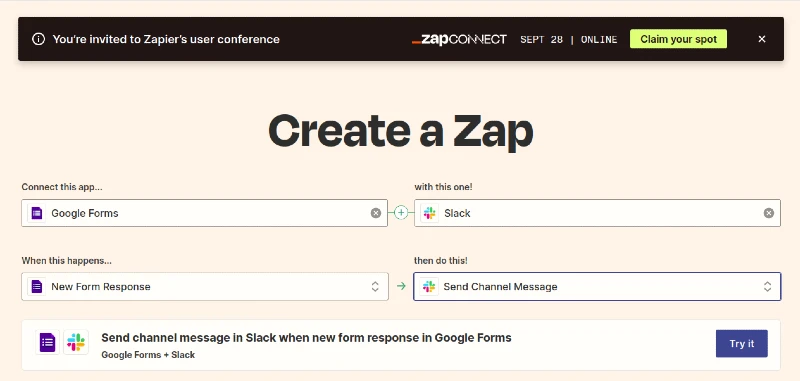
Upon deciding to create a new Zap with Google Forms, Zapier will prompt you to connect your Google Forms account.
Step 2: Sign in to Google Forms on Zapier
If you're not already logged into your Google account, you'll be directed to a sign-in page. Here, input your Google account credentials associated with your Google Forms.
Step 3: Google Forms Login
Once you enter your details, you'll be presented with a list of Google accounts associated with your credentials (if you have more than one). Choose the account with which you intend to create the Zap.
Step 4: Grant Permission
After selecting the desired Google account, you'll encounter a permission request screen. This is Zapier asking for rights to access and work with your Google Forms data. Click on "Allow" to grant these permissions. This step is crucial as it enables Zapier to automate tasks associated with your Google Forms.
Step 5: Successful Connection
If all the above steps were executed correctly, a success message will appear, indicating that your Google Forms account is now successfully connected to Zapier. This means you're all set to start automating tasks between Google Forms and other applications using Zapier!
Note: Always ensure that you're granting permissions to trusted apps. Regularly review connected applications in your Google account settings to maintain security.
Congratulations! With your Google Forms now integrated into Zapier, you can easily create automated workflows, saving time and enhancing efficiency. Whether you want to transfer new form entries to a spreadsheet, trigger email notifications, or connect with other tools, the sky's the limit. Happy Zapping!
Things to Consider: Costs and Alternatives
As we conclude our guide on the seamless integration of Google Forms with Zapier, it's crucial to shine a light on a few significant considerations.
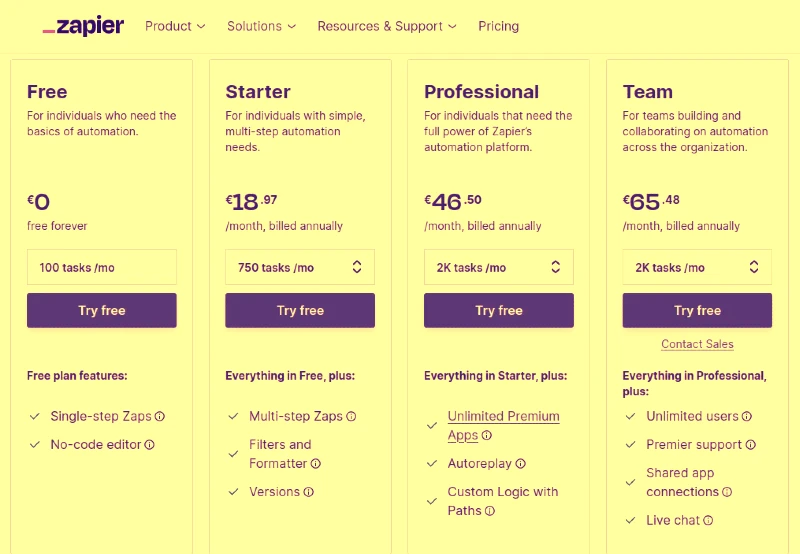
First and foremost, it's essential to remember that while Zapier is a powerful tool for automation, it mainly operates on a paid model. Depending on your automation needs, the frequency, and the intricacy of the tasks, this could imply added costs. Always peruse Zapier's pricing plans to ascertain whether they align with your budgetary constraints and cater to your specific requirements.

However, the automation realm extends beyond just Zapier. Numerous other platforms might not only meet your automation demands but also be more wallet-friendly. For instance, Make (formerly known as Integromat) and IFTTT (If This Then That) are commendable alternatives that facilitate integrations with Google Forms, offering diverse automation solutions.
Additionally, while Google Forms is a popular choice for many, it's worth noting that there are other feature-rich all-in-one form builders available in the digital space. An excellent example of such an alternative is Nerdy Form. Platforms like these often come with enhanced features that might negate the need for additional tools or integrations.
In choosing the perfect automation tool, the key lies in identifying your specific needs, setting a budget, and gauging the level of customization you desire. Explore, compare, and contrast these platforms, understanding their advantages and limitations, and make a well-informed choice that perfectly complements your automation aspirations.
In wrapping up, while automation can be a game-changer, it's pivotal to be cost-conscious and informed about the multitude of options at your disposal. Dive into the world of automation with discernment and clarity. Happy automating!
