10 Google Forms Survey Templates for Efficient Data Collection
Published: 3 years ago
In an increasingly digital world, the need to integrate payments into online forms is becoming essential. Google Forms, known for its user-friendly and straightforward design, unfortunately, has its limitations. For instance, it doesn't allow users to collect payments out of the box. However, thanks to the wide range of add-ons available, it's possible to overcome this limitation.
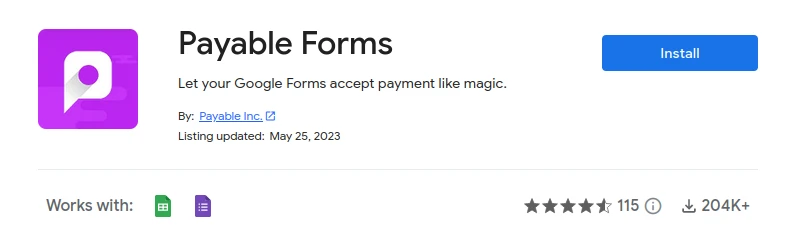
One such add-on that serves this purpose seamlessly is Payable Forms. This add-on provides a reliable solution for collecting payments via Google Forms, catering to various scenarios like event registrations, fundraising, selling merchandise like t-shirts, invoicing, and more. This blog post will guide you through the process of collecting payments with Google Forms using the Payable Forms add-on.
The Payable Forms Add-On brings a layer of payment acceptance capabilities to Google Forms. This innovative add-on identifies money amounts inside the answers that users select, automatically calculates the order total, and updates the connected Google Sheet with the payment status. The checkout process, secured and matching your form's theme, enables quick and seamless collection of payments.
One of the major advantages of the Payable Forms Add-On is its compatibility with a range of payment processors. It allows you to connect with payment providers like PayPal, Stripe, Square, Rapyd, and Razorpay, providing a comprehensive and flexible solution for your payment collection needs.
With Payable Forms, not only do you know who has paid, but you can also automatically send reminders after 24 hours to those who have not yet made a payment.
Proceed with the following steps to establish the Payable Forms add-on, thereby preparing your forms to efficiently accept payments.
Your first step is to install the Payable Forms Add-On. You can easily find this add-on in the Google Workspace Marketplace.
Once the add-on is installed, you will notice an additional puzzle piece icon in the toolbar when you open a Google Form. Upon clicking this icon, you will find 'Payable Forms' listed in the drop-down.

After installing the add-on, your next task is to connect a payment provider. As mentioned, the Payable Forms Add-On supports multiple payment processors, including PayPal, Stripe, Square, Rapyd, and Razorpay.
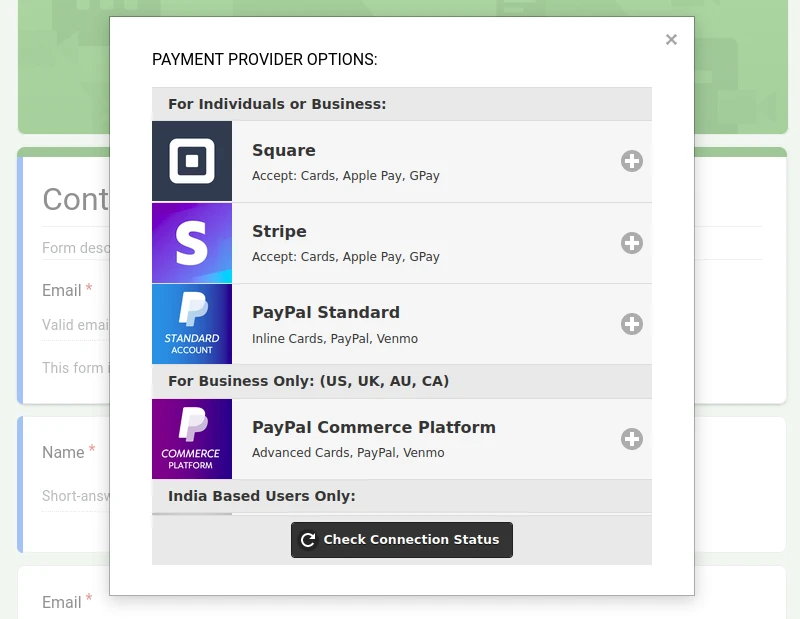
The add-on will automatically identify money amounts inside of the answers that your users select and calculate the order total. Once you select a payment provider from the list, complete the connection flow and toggle the form to "Yes" for making this form payable.
Before you go live with your payment collection form, Payable offers a 'Test Mode'. This mode allows you to ensure your form is working and calculating as expected.
Click on the eyeball icon in your toolbar to preview your form. You can submit a mock form to check how the checkout process will appear to your form's submitters. Once you are confident that everything is working as expected, toggle the test mode to "Off - Real Money". And voila! You are ready to collect real money through your Google Form.
After setting up the payment gateway and testing your form, the final step is to track the payments.
Each form submission and its related data automatically flow to a linked Google Sheet. In this sheet, you will notice that Payable has added new columns to track the status of each submission.
After a user submits a payment, the Payable Status will update to "Paid". For those who haven't paid yet, Payable will automatically send reminders after 24 hours. If you use manual methods of payment, you also have the option to manually mark orders as paid.
Integrating a payment gateway into Google Forms may initially sound daunting, but with the Payable Forms Add-On, it becomes a hassle-free process. From installation to tracking payments, each step is designed to be user-friendly and efficient.
Collecting payments with Google Forms using Payable Forms not only overcomes the limitations of Google Forms but also provides a secure, comprehensive, and versatile solution for your payment collection needs. Whether you're hosting an event, raising funds, selling merchandise, or invoicing, Payable Forms has got you covered.
Related Articles
Just discovered Nerdy Form? Try our free form builder now!
Sign up for FREE